TABLE OF CONTENTS
Overview
Replay Media Splitter is a really easy way to extract or remove portions of
audio and video files. With a visual display, and an easy way to include and
exclude segments of your media, you'll be slicing and dicing video and audio
files in minutes.
Replay Media Splitter supports these popular video and audio formats:
If your media is not in one of these formats, use a conversion tool like Replay
Converter.
Here's a quick summary of the editing process:
- Load your media file.
- Add Markers to split
your media into Segments.
- Include or exclude segments.
- Output the resulting file.
Hint: Position the mouse arrow over any button to read what the button
does.
Read on for the details...
How to Edit Media
Here are the basic steps for editing audio and video files:
- You'll need to load a file to edit first. Click the Input button,
then pick a file from the dialog:
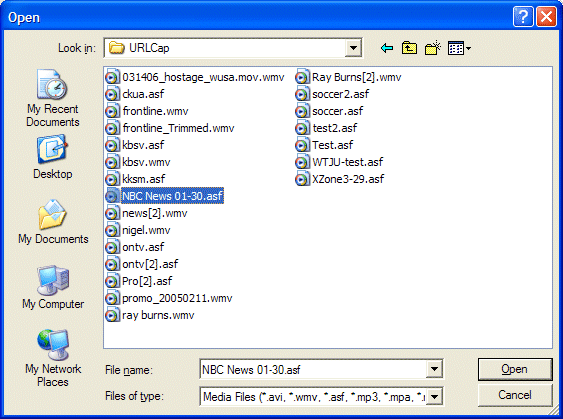
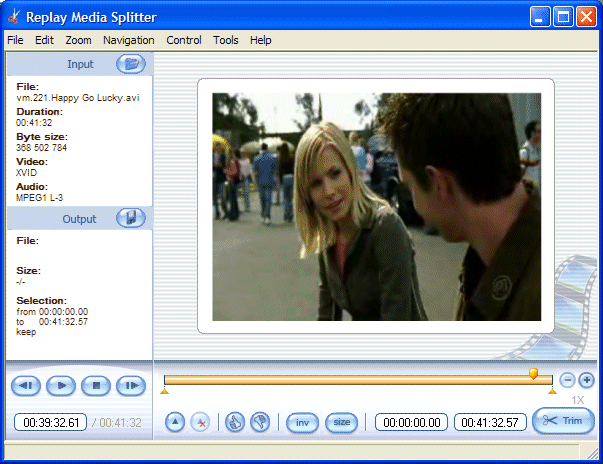
- Pick a file to edit, and click Open. The file is loaded and your
display looks something like this:

- Next, you'll need to mark segments. Click on the timeline
where you want to mark a segment boundary, then click the Add Marker button
 . A
new marker appears as shown:
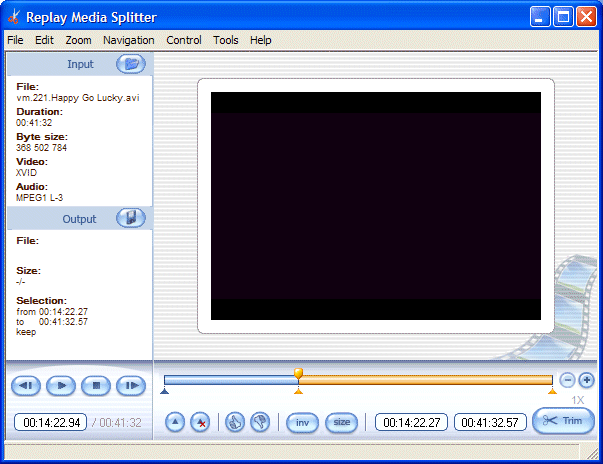
- You now have two segments. To include a segment in the final output file,
click it to select, then click the Include button
 .
The segment appears bold.
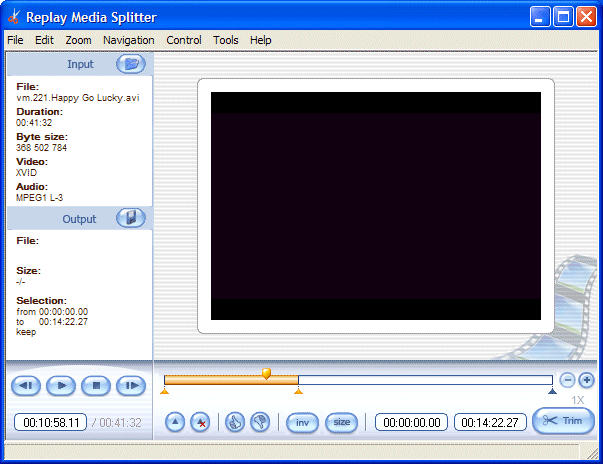
- To exclude a segment, select it, then click the Exclude button
 .
Below shows a file with two segments, the first one included, and the second
one excluded:
- Once you're done marking segments, click the Output button, and
enter a file name for the output file. The newly edited
file is built.
How to Save Segments
There are times when you might want to set many markers and save certain individual fragments. Here's how:
- Once you have marked your segments (as described in the steps above), right-click on a segment you'd like to save as a separate file and choose Save Selected Fragment As.
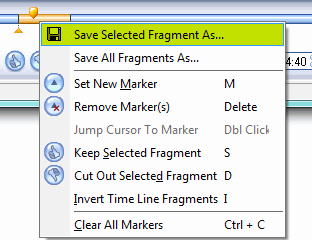
- Alternatively can choose Save All Fragments As and Replay Media Splitter will save all of your segments as individual files numbered sequentially.
Hints:
- Replay Media Splitter makes it easy to navigate to important parts of the
file. See the How to Navigate Media section for details.
- You can get a size estimate for the final file by clicking the Size button.
- To invert your selections (change included segments to excluded, and vice
versa), click the Inv (invert) button.
- You can delete markers easily: Just click the marker,
then click the Delete Marker button
 .
.
- Use the Zoom In and Zoom Out buttons
 to
magnify the timeline.
How to Navigate Media
Now that you know how to do basic editing, it's time to learn how to move
the selector to important parts of the audio or video file. Replay Media Splitter
has a lot of really handy ways to get to the important parts of any media file.
Here's everything you need to know about navigating:
- Use the Play button
 to
play the video or audio from the selection point. You can set a marker at
the current playback position at any time using the Add Marker button
  .
.
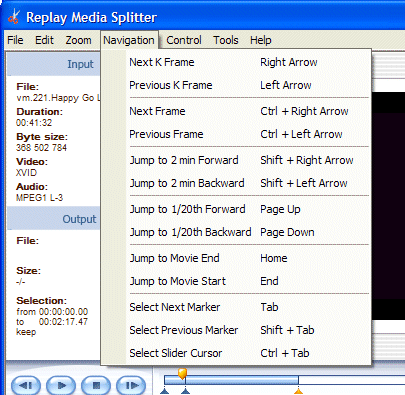
- The Navigation menu lets you move forward and back in various handy
increments, and also gives you a quick reference to the various keyboard
shortcuts:
About K-Frames
The left and right arrows move to the previous or next K-Frame. K-Frames are
significant points of transition in a video file - usually the start of a new
scene or camera shot. Moving between K-Frames is an efficient way to locate important
segments quickly.
Here's the technical side of K-Frames. Video files are a series of images.
When video files are compressed, rather than compressing each image in the
video, some images are calculated as a difference from the previous image.
If there are several seconds with little movement, for example, rather than
saving each frame of the same image, the video compressor just saves the differences
between each frame, which may be small. This leads to efficient compression.
However, there are times when two adjacent frames are very different, such
as a new camera shot. In that situation, an entirely new starting frame -
the K-Frame - is brought into the compression process. Ensuing frames are again
calculated as differences from the K-Frame.
How to Join Files
Effective with version 1.6.903 Replay Media Splitter can join files together into one file. The media must be of the same file type.
- To join files, click Show Join Manager from the Tools menu:
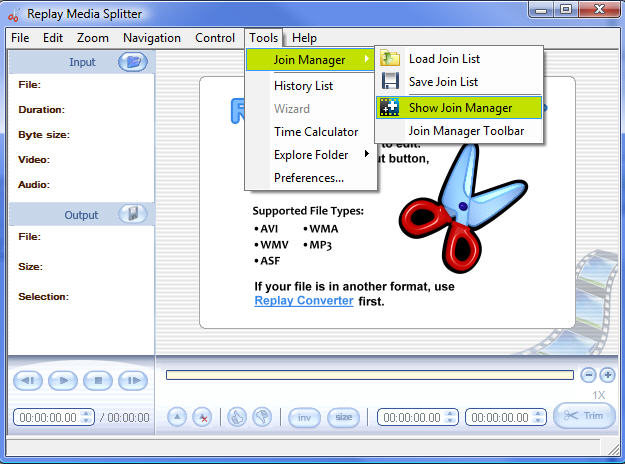
The Join Manager will open:
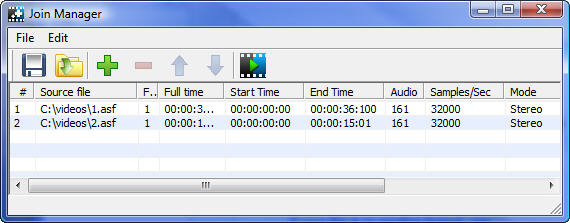
- Click the green add button to add the files that you want to join. You can also drag-drop files into the window. Click the minus button to remove a selected file from the list.
- Order the files into the order that you would like them joined. Highlight an entry and use the arrow buttons to move that entry up or down the list.
- Click the Start Joining button and select a location to save your joined file.
Note: MP3 files will take on the MP3 tags of the last file in the list. If you would like your MP3 tags to be something different, you should edit tags of the joined file manually.
Credits
Replay Media Splitter was developed by Solveig Multimedia (c) 2005 – 2007. All rights Reserved


