TABLE OF CONTENTS
Welcome to Replay Music for Mac
Replay Music for Mac is an easy way to download the music you love from your favorite streaming music sites. Just switch it on and Replay Music will save music files from many popular streaming music sites as they play on your Mac.
These downloaded files can be transferred to other devices like your iPod, iPhone, iPad, or burned to a CD.
Replay Music uses a Music Fingerprinting technology to automatically identify and tag all recorded music files.

Start Recording
Using Replay Music for Mac is as easy as clicking the monitoring switch from  to
to  .
.
Replay Music for Mac locates the web address of the music file you are playing, reconnects to the host server, and makes an exact copy of the file on your Mac. Typically, this download process is much faster than actually playing the file. Once the download process starts, you can even close your audio player, and the file will continue to be downloaded.
Note: Some web sites use encryption when streaming audio. Replay Music for Mac cannot downloaded these encrypted streams.
Track Tagging
Replay Music uses the Rovi digital fingerprinting technology to automatically recognize and tag the music you have downloaded. In some cases the track may not be identified by the music database, or you may wish to change the tag. You can easily edit the track tag information from within Replay Music.

Here's how to edit the track information:
- Click once in the field that you'd like to change. A blue box will appear around it.
- Type your desired track, artist or album name.
Note: If you would like to view the file in Finder, simply right-click on the track in your list and select Reveal in Finder.
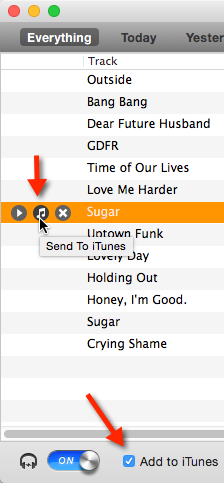
Send Track(s) to iTunes
There are two ways that Replay Music for Mac can send tracks to your iTunes Music library.
- Select a track or tracks then hover your mouse just to the left of the track name. A few icons will appear. Click the
 icon and the selected track(s) will be added to iTunes. The track status will change to Sent to iTunes.
OR
- Or, enabling the Send to iTunes option at the bottom of the interface will send every track to iTunes as each finishes downloading and converting.
Play Downloaded Music
There are many ways to play your downloaded music. Here are a few:

- Select a track that you would like to play. Hover your mouse just to the left of the track name. A few icons will appear. Click
 and your track will begin to play. The icon will change to a stop icon. Simply click it to stop playing.
OR
- Right-click on the track and select Reveal in Finder. Right-click on the track in Finder and select Open With. Then choose your desired application to play the file.
OR
- Open your chosen download location as set in Preferences. Then choose the files to play.
OR
- If you've sent your tracks to iTunes (as explained above), find and play your tracks there.
Preferences
From the Replay Music menu bar, select Replay Music, then Preferences. Here's what you can configure:
General Preferences:
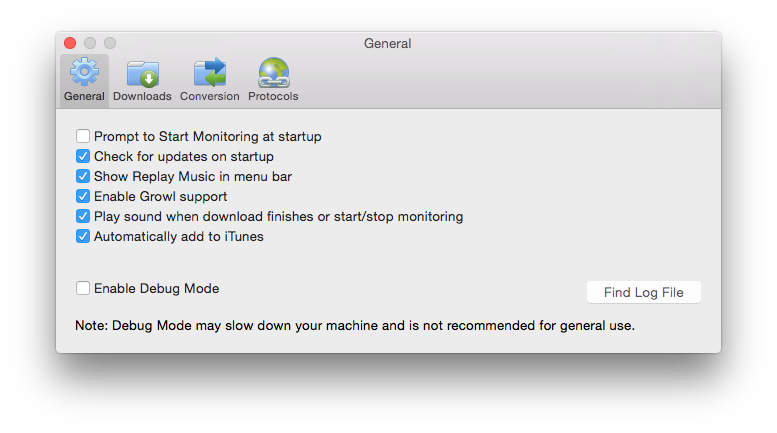
- Prompt to Start Monitoring as startup: will show the welcome screen every time you open Replay Music. Leave this unselected and Replay Music will begin monitoring automatically upon opening.
- Check for Updates on Startup: will check to see if there is a new version of Replay Music available to download.
- Show Replay Music in menu bar: turns on or off the display of the Replay Music icon and menu in the OSX menu bar.
- Enable Growl support: Replay Music uses Growl to discreetly show you when a stream has been detected and is downloading or completed. You can turn this on or off.
- Play sound when download finishes or start/stop monitoring: We like the sounds. But if you don’t, here’s where you can turn them off.
- Automatically add to iTunes: Will add all downloaded music tracks to your iTunes library when they are finished downloading and converting. You can also enable or disable this option in the main window.
- Enable debug mode: Use this only when requested by technical support. It generates a more detailed log if you should need help.
- Find Log File: This is very helpful. If you are submitting a tech support ticket, we can help you better if you attach your log file.
Downloads Preferences:
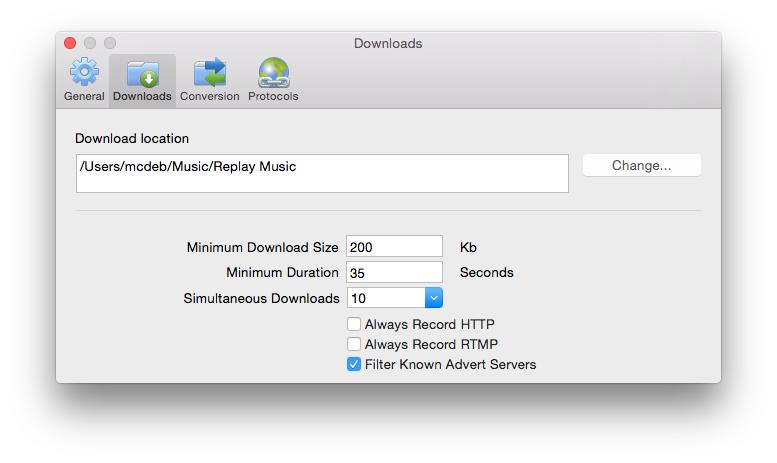
- Download location: Set the folder where you’d like Replay Music to keep your downloaded music.
- Minimum Download Size: Specifies the smallest file that is saved. Sometimes when recording, small advertisements might be captured by Replay Music. You can increase the size if you discover you are getting too many unwanted files. The default minimum size is 200kb. We find this is satisfactory for most.
- Simultaneous Downloads: The is the maximum number of downloads happening at any one time. The default is 10.
- Always Record HTTP: When checked, HTTP streams will be recorded rather than downloaded. This requires that you leave the player open for the entire track as the data is recording in real-time rather than downloading.
- Always Record RTMP: When checked, RTMP streams will be recorded rather than downloaded. This requires that you leave the player open for the entire track as the data is recording in real-time rather than downloading.
- Filter Known Advert Servers: will stop advertisements from known servers from downloading.
Conversion Preferences:
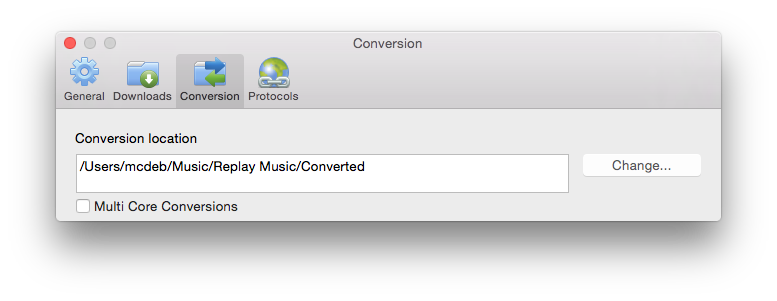
- Conversion Location: set the folder that you would like Jaksta to save your converted files.
- Multi Core Conversions: if enabled will use additional CPU cores (if available). This can result in faster conversions, but uses more processing power.
Protocols Preferences:
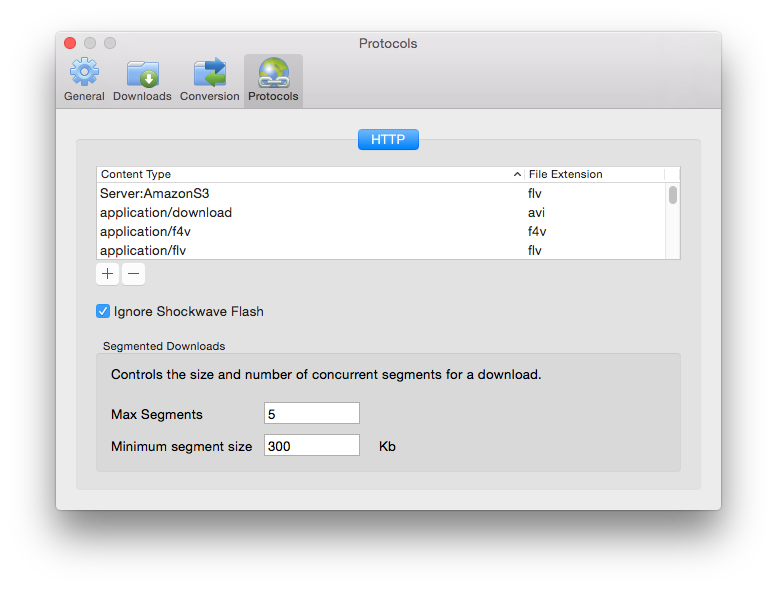
This dialog shows the HTTP content types that Replay Music recognizes, and what extension it adds to the saved file. You will only need to change this if you are technically savvy, and a new media type is discovered.
- Ignore Shockwave Flash: Leave this checked if you want Replay Music to ignore SWF files like flash banner ads.
- Max number of segments: When Music Minor downloads, it asks for different parts of the media simultaneously. This effectively speeds up the downloading process. If you find that Replay Music is using too much network bandwidth to record, reduce this number. Increasing this to more than 5 segments won’t speed up downloads though.
- Minimum Segment size: Lets you determine how big the smallest segments to download should be. For example, if this is set to 300 Kb, and the size of the video to be downloaded is 300 Kb, then a single request will be used. For smaller media files, downloading with a single request is faster than using multiple segments.
